2 Great EPIC Platform Tips
Whether you have used EPIC platform for many years, or you have started out recently – you might not be aware of these 2 great functions that can add value in your respondent’s journey with DiSC while also saving admin time for you.
1. Adding Custom Email Messages while sending out access code emails – Great for better respondent journey and quicker completion of the questionnaire
EPIC allows you to save several email templates. These can be used for sending out access codes or reminding participants to complete their profiles.
Once stored in the library, the messages can be inserted into emails anytime EPIC provides you with an option to insert Custom Email Messages.
Instructions:
Go to Personal Options / Manage Custom Messages
EPIC will display the custom message folders and messages you already have stored.
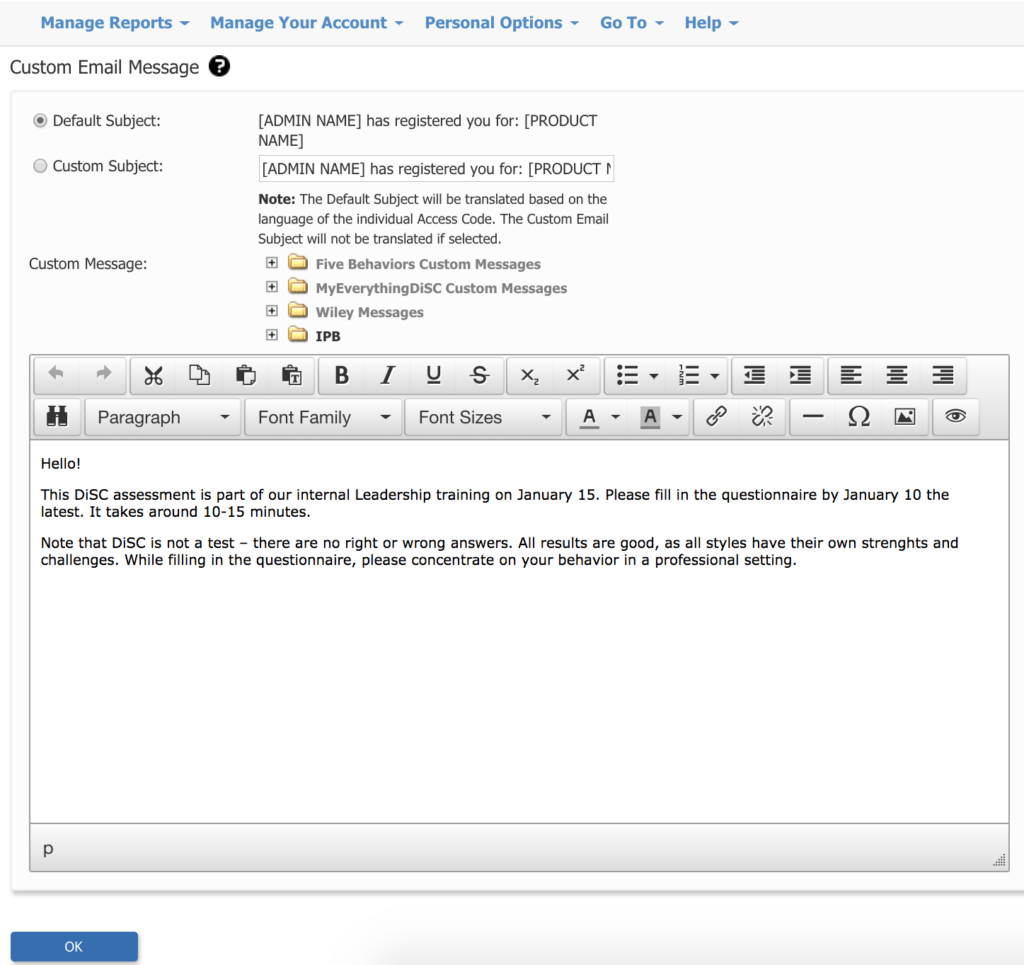
Click Create a new message and you’ll see a screen like this.
- Give your custom email message a title.
- Select a folder in which to store the new message (you can create a new folder for that).
- In the text editing area, enter the text you want to include in your message.
- Press the Save button to complete the process.
On the image above you can see a sample text we usually recommend adding to the access code email in order for the respondents to be prepared better.
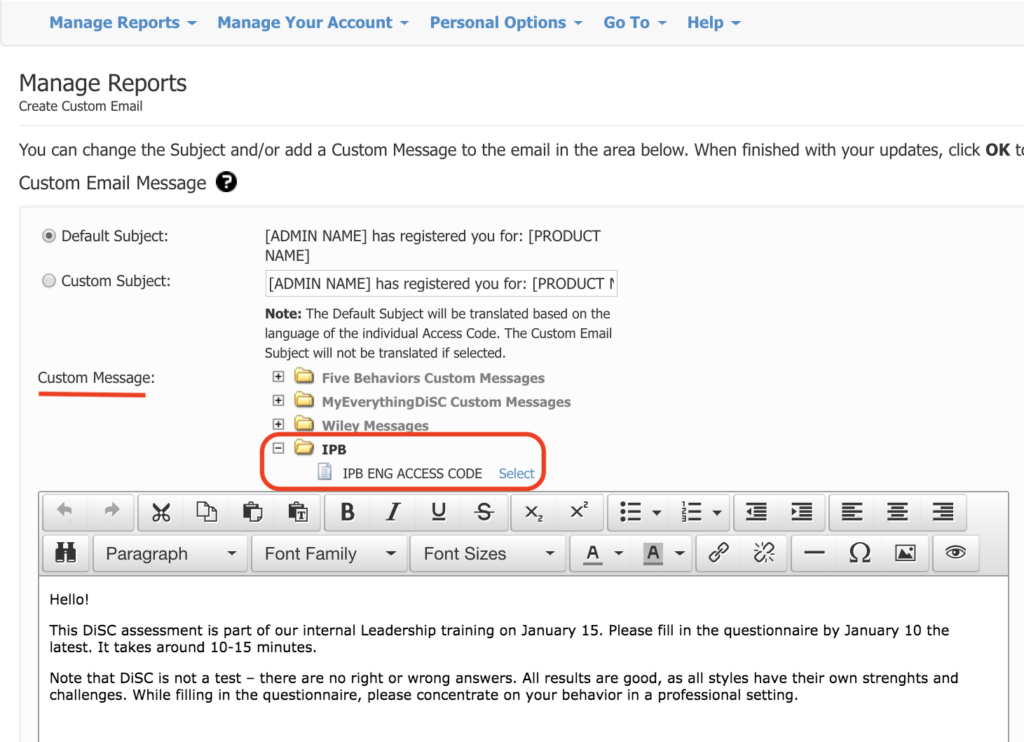
After this is done, you can always choose this template when you send out assessment links. For that click OK on the final notification message before sending out the email:
On the next page find the saved template under Custom Messages and click Select. The message is now added to the email and you can click Send.
2. Import Respondent details from Excel file – Great for a faster process of sending out the assessments
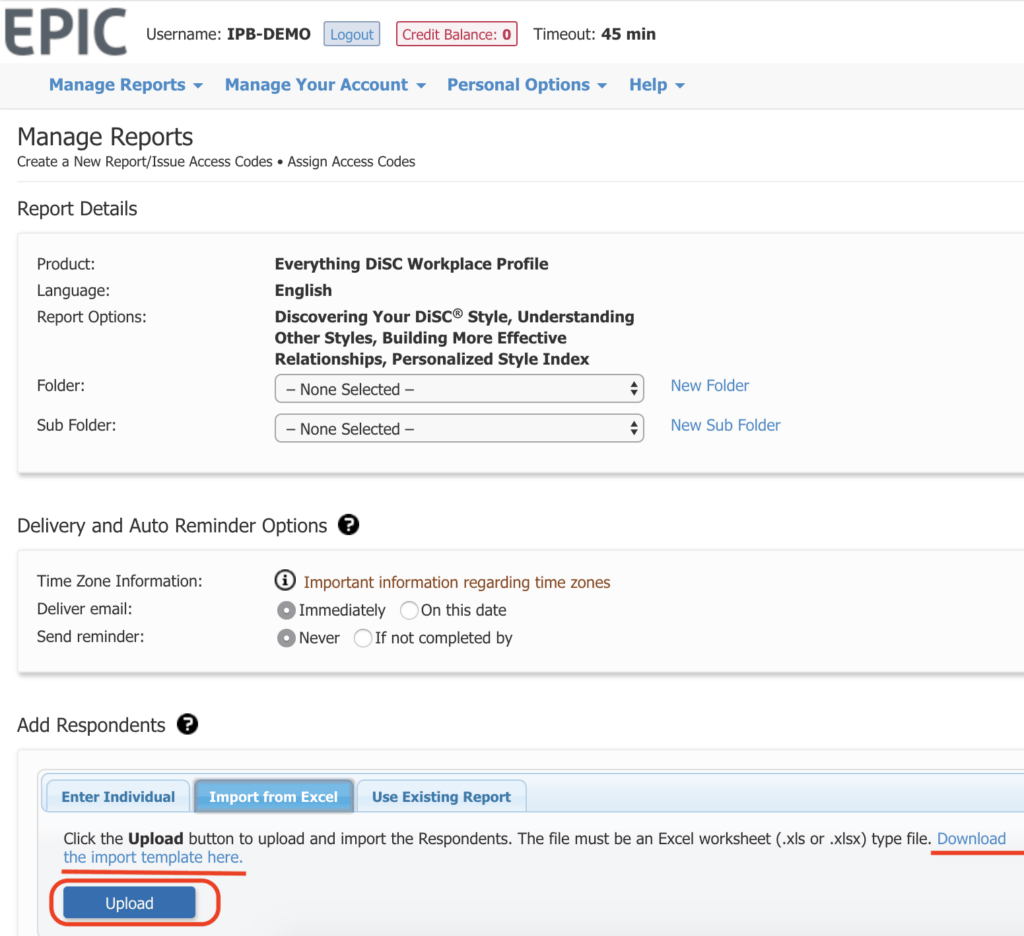
If you are sending out 5 or more new assessments, then you can save a lot of time by importing respondents’ data directly from an Excel file. It is quicker to add all the respondents to Excel and upload it to EPIC rather than adding the respondents one by one.
Instructions:
Download the template and fill it in with your respondents’ data. In column C, choose if you want respondents to get their results after completing the assessment or not. Save the Excel file and then upload it by clicking on the Upload button as shown above.
For filling in the Excel, just follow the instructions on the downloadable import template.
If you haven’t used these moves in EPIC before, then we hope that you can try these out soon and find them useful. Feel free to ask us, if you need any further guidance!
You might also be interested in


